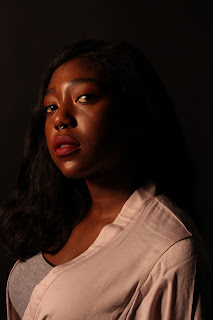
Approaching the studio shoot task I was a little nervous, as you have to get the lighting spot on in order to create broad or narrow lighting. In the lesson my test shots were really good, executed well and in focus and sharp. I think this was down to feeling comfortable and relaxed in the environment as Bayton was there. However, when we went to book a studio the week after to take our pictures. I wasn't very clever and left my glasses at home therefore all of my photos were blurry and out of focus. I was upset that these photos weren't to a high standard as my model was very beautiful too. But luckily I had enough time before the hand in just about to get back in the studio and re shoot. Unfortunately my model I had in the first shoot wasn't available, but I found another model that was just as eager. I got to work, but before that, put my glasses on! I brought in a silk dressing gown for my model to wear as I felt the fabric and colour was very feminine and would suit the style of photos. I then set up the lights, I first set up a soft box, but felt the light was a little too soft, so changed the head and went for a harder light. After doing this my photos came out exactly how and what I wanted, all in focus too. I directed my model as to where to stand, look, their posture and what to do with their hands. I feel the relationship between the model and myself was very relaxed and calm so she was easy and compliant when I asked her to change positions. Pictured below are some behind the scenes of the successful shoot.
APOLOGIES FOR THE BLURRY B.T.S PICTURES
PICTURED ABOVE ARE MY UNEDITED VERSIONS OF THE STUDIO SHOOT
Pictured above are the first studio shoot pictures I took. I feel the composition is executed well, however my lighting wasn't as good as it could have been and not all of them were in focus.
I hope you enjoy. Thank you.


No comments:
Post a Comment